I am a big fan of installing and testing software on my
laptop.
Check feasibility for different set of environments.
I have windows 7 64 bit laptop on which I have installed
VMware Workstation.
Infrastructure requirements:-
1:- Installed windows 2003 machine , Install role DC and DNS Domain name “dc.com”.
Reason for choosing Windows 2003 as it takes less memory and
CPU.
2:- Installed Two Windows 2008 R2 SP1 machines named as
xend7 and xendapp
Once the installation of OS is complete Enable Remote
Desktop
Disable Windows Firewall.
3:- Join server in Domain.
Once server is up mount xendesktop7.1 iso on xend7 machine
and start installation.
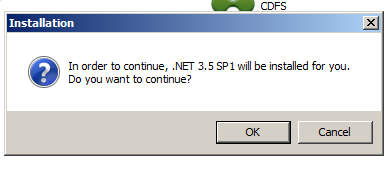
4:- It will
automatically start the installation of .NET 3.5 SP1


5:- Click on Start

6:- Click on Delivery Controller , you can see that Virtual
Delivery Agent for Windows Desktop OS is greyed out, as it is not and desktop
OS.


7:- Accept License Agreement
and click on Next

8:-
As I have limited number of servers so I will be installation all the core
components on one server ie xend7. Click Next.

9:- it will automatically install SQL server 2012 as a
Database for store front and Delivery controller. Click Next

10 :- Click Next

11:- Click Install

12:- Click Finish

13:- It will launch Citrix Studio and click on Create Site.


14:- Select “Configure
the site and start delivering application and desktops t users”
and Enter site Name like I
entered xend. Click Next

15:- It will automatically choose the Database location and
Database name. Click Next.

16:- Click Ok.

17:- As I have downloaded Evaluation license , so I will be
selecting “ use the free 30-day trail”
and click Next.

18:- I don’t have any Virtual infrastructure like Hyper –V, Xenserver or Vmware, so I select None and
click Next.

19:-I don’t have any App-v server so I select No and click
Next.

20:- Click Finish.

20:- On XENDAPP server start the installation of Virtual
delivering agent for window server OS, It will automatically start the
installation of .NET 3.5 SP1.

21:- Click on Start.

22:- Click on Virtual Delivery Agent for Windows Server OS.

23:- Select “ Enable connections to server machine” and
click next.

24:- It will install Virtual Delivery Agent and Citrix Receiver , click Next

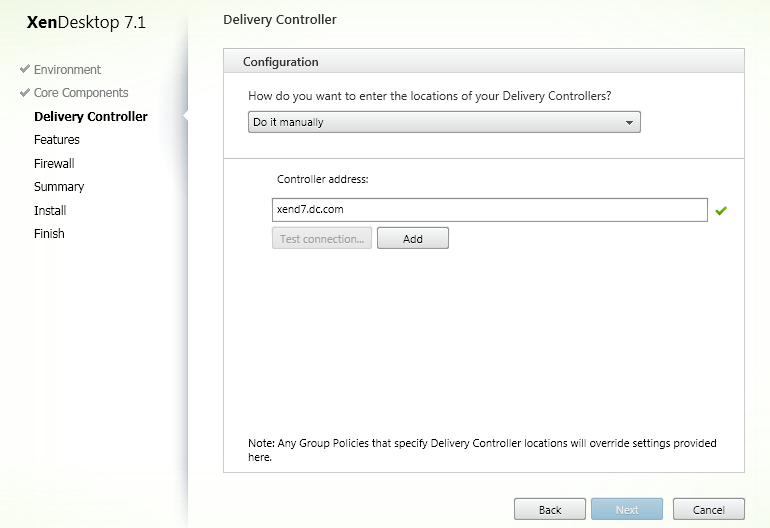
25:- Enter the Name of Controller address, in this case its “xend7.dc.com”,
click on “Test connection”.

26:- Click on Add
27:- Click on Next

28:- Click Next

29:- click on Next

30:- Click on Install.

31:- Click on Close
and it will reboot machine.

32:- Once machine is
UP it will install all the components and Reboot Machine.
33:- On xend7 server open Citrix Studio Create Catalog

34 :- Click on Next

35:- Select “Windows
Server OS” and click Next.

36:- Select Another Service or technology and
click Next.

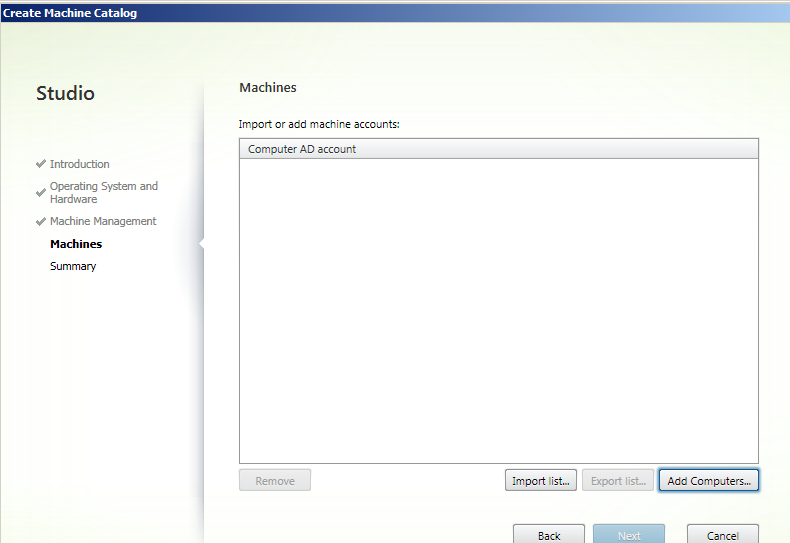
37:- Click on Add Computers
and Enter the Server Name on which we installed Virtual Deleviry Agent for Server OS ie xenappd and click next.

38:- Enter the Machine
Catalog Name “ First Catalog “ and click Finish

39:- Click Finish

40 :- Click on
Delivery Group, Applications and Assign Users.

40:- Click on Next.

41:- Select First
catalog and click on + to add machine.


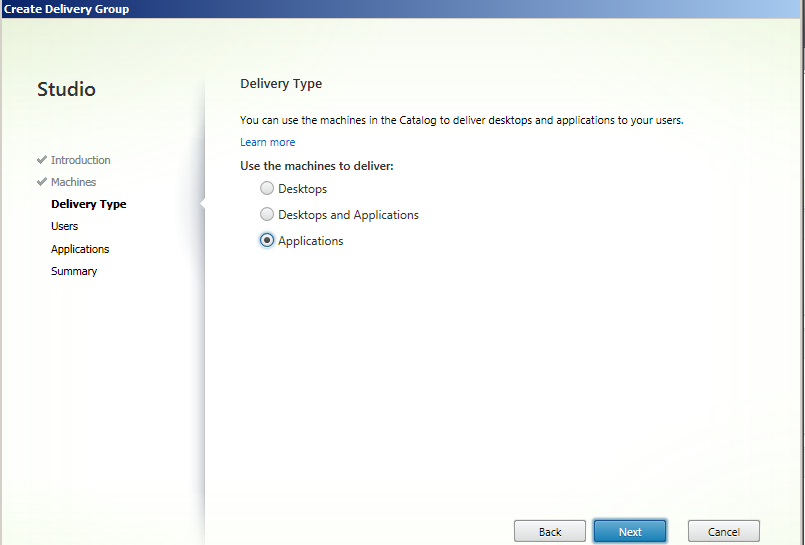
42:- Select
Applications and click on Next.
43:- Click on Add
users and Enter Domain users for testing purpose. Click Next


44:- It automatically
discover all the installed application, select Notepad and click on Next.


45:- Enter Delivery
Group Name like ” Notepad” and click on Finish.


47:- Enter
credentials and add application to your Favorite Apps.
